FreeBSD has always been my OS of choice but in the past I have always viewed upgrades as one point of failure. What is the upgrade doesn’t go as expected, How do I role it back? If you have FreeBSD installed with ZFS, then all these concerns can go away. Upgrading with ZFE boot environments allows you at any point to role back to your old version. You can even run two versions and flip between them.
I documented this procedure while going from FreeBSD 12.2 to FreeBSD 13.1 but it can be used for just about any upgrade. I also don’t do as many reboots as freebsd-update calls for (only 1 reboot) and have had no issues.
NOTE: The freebsd-update utility now detects if you are running ZFS and automatically creates a new boot environment. I have not yet had a chance to play with the freebsd-update created boot environments and may update this post when I do but for now, this procedure still works great.
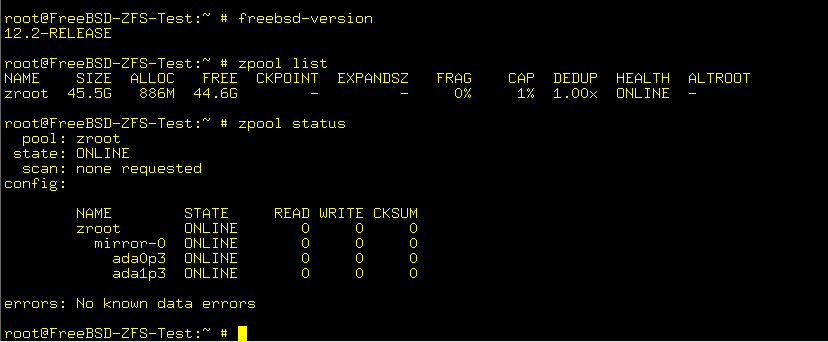
My current system:
What is in the ZFS Boot Environment
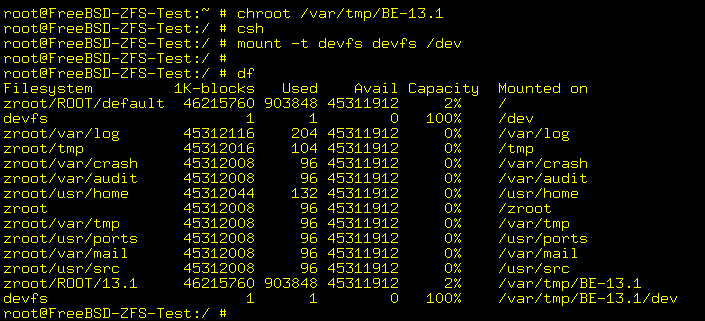
Creating a ZFS Boot Environment actually creates a ZFS snapshot/clone. There are some very important things to know…. The boot environment is (by default) created from the clone of currently active ZFS boot pool. If you have a standard FreeBSD ZFS on root install then that would be zroot/ROOT/default (the ones that is mounted on / on your system). You can check this with the df command like so:
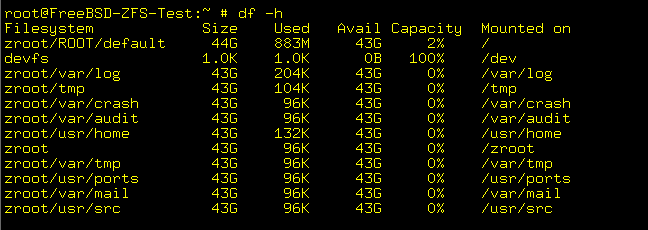
The image above shows that zroot/ROOT/default is mounted as my root file system. This is the file system that will get cloned. This is important to know because any pools outside that mount point will not get cloned and will be the same for the old and the new system. This is not usually an issue as by default those are just data file systems that can be shared from old to new. If you have a default FreeBSD install, then you will be fine.
From my list, the following pools will not be part of the boot environment.
zroot/var/log
zroot/tmp
zroot/var/crash
zroot/var/audit
zroot/usr/home
zroot/var/tmp
zroot/usr/ports
zroot/var/mail
zroot/usr/src
Create the new BE environment
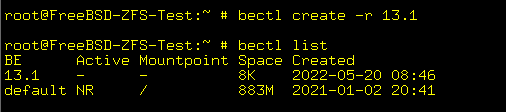
Now lets create the new ZFS boot environment. Since I an upgrading to FreeBSD 13.1 I will call the new environment 13.1. This will eventually be created as zroot/ROOT/13.1
Now lets mount that so we can chroot into it and to the upgrade on the new new system and leave the 12.2 alone.
Start the upgrade
The actual upgrade is very similar as before. The only difference is that we are not going to reboot until all the installs are done.
Clean up the old FreeBSD-update directory.

Get freebsd-update to grab the new updated files for the 13.1-RELEASE
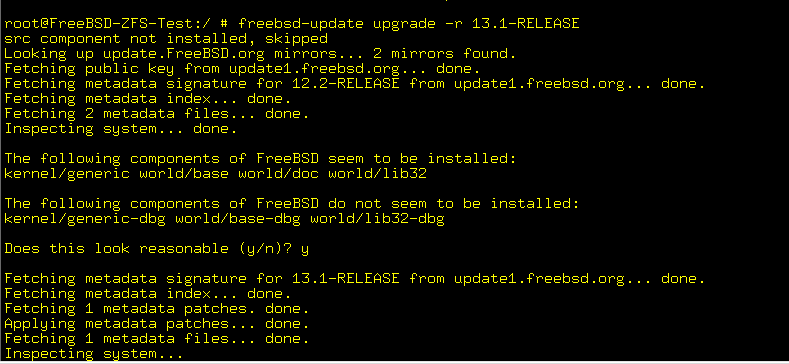
Next run freebsd-update to install the kernel changes, and then (don’t reboot) run the freebsd-update to install the base system updates.

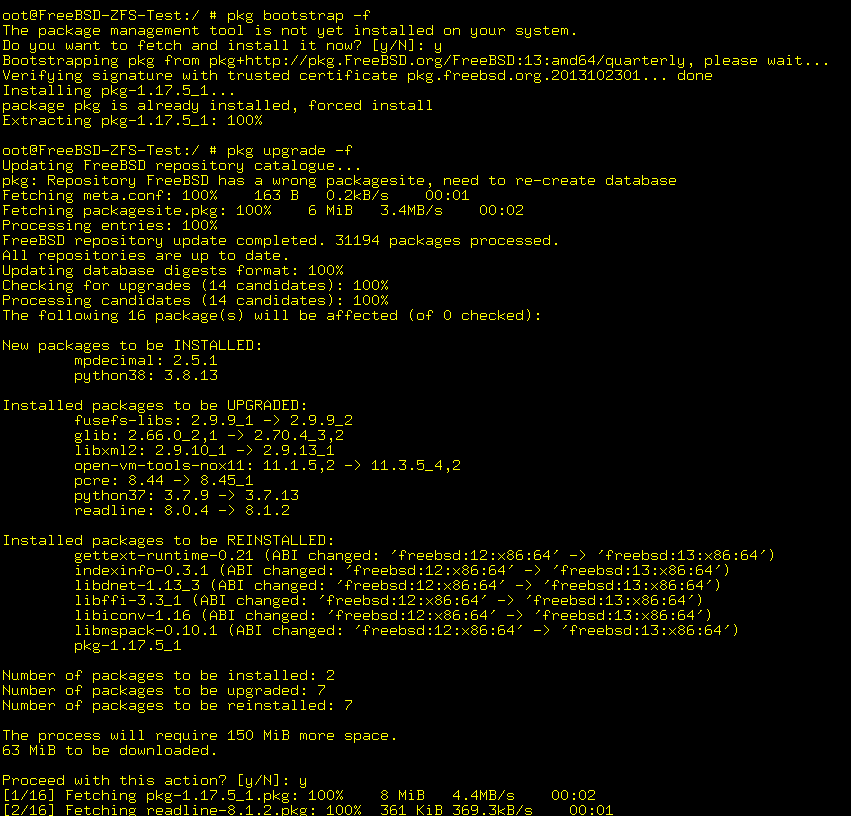
Now, Upgrade and packages installed on your system.
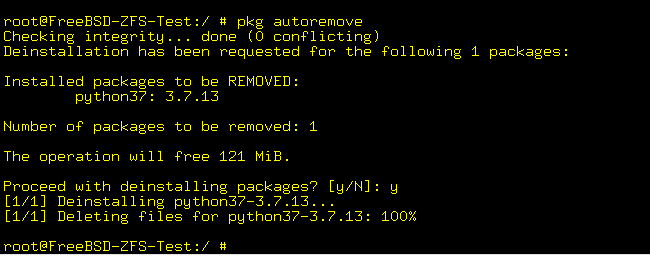
Now remove any old ports no longer needed.
and one more freebsd-update to remove any old libraries that are no longer needed.

The update is now finished but before we reboot into our new system, we need to finish up so that it boots into the new system.
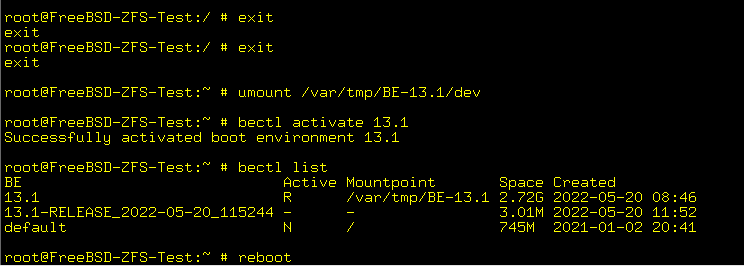
Next we should update the boot code. How you update the book code depends on the drives, ZFS pool, and the type of partition table used. It is beyond this article to explain all the boot track updates possible but I will show the one for this system. This system boots from a two drive ZFS mirror on drives ada0 and ada1. I also use GPT as the portioning type and don’t use UEFI (standard BIOS boot). For this type of system, we need to update the boot track on both the mirror drives ada0 and ada1. Here is the command:
# gpart bootcode -b /var/tmp/BE-13.1/boot/pmbr -p /var/tmp/BE-13.1/boot/gptzfsboot -i 1 ada0
# gpart bootcode -b /var/tmp/BE-13.1/boot/pmbr -p /var/tmp/BE-13.1/boot/gptzfsboot -i 1 ada1
You should now reboot and it will come up in your new upgrade system.