
OctoPrint is an excellent control system for almost any 3D printer. If you are looking for a way to network your 3D printer and give it a nice web interface, look no further than OctoPrint. OctoPi is a Raspberry Pi distribution that bundles OctoPrint and everything else you need, in a nice neat package for the Raspberry Pi. The first thing I do when I get another 3D printer, is grab a Raspberry Pi and install OctoPi on it. I have it running on all my printers.
If you go and grab the latest version of OctoPi (0.18 as of this post), then you already are running OctoPrint and Python 3 and don’t need read any further. For those of you, like me, that have been running OctoPi for a while, you probably have an older version that is still running OctoPrint and python 2.7.x and need to upgrade it. Python 2.7.x is no longer supported. OctoPrint will still run on 2.7.x for a few more versions but you really should upgrade to Python 3. Many new plugins also only support Python 3.
If you are running OctoPi then you have a couple of options:
- Re-flash to OctoPi version 0.18 or later that uses Python 3 by default
- Use the upgrade script and documentation below to upgrade OctoPi 0.17 to use Python 3
NOTE: if you are running a version that is older than OctoPi 0.17, you will have to Re-flash to version 0.18 as the script below only works on OctoPi 0.17 right now.
Upgrading using the Script
Requirements:
- You must already have Python 3.6+ already installed on your system (OctoPi 0.17 does).
- OctoPrint 1.4.0+ in order to support Python 3. NOTE: the script will install the latest version of OctoPrint when it runs.
If you have OctoPi 0.17 and have been upgrading OctoPrint, then you should have the above requirements and by ready to go.
Running the Script
Login into the CLI on your OctoPi server. The best way to do this is with ssh. Login as the user: pi
Run the two following commands:
$ curl -L https://get.octoprint.org/py3/upgrade.py --output upgrade.py
$ python3 upgrade.py
The script will print a message telling you what it is going to do. Press <ENTER> to continue.

Next it will probe your system and detect all the plugins you use. Check them over and if they are OK, Press <ENTER<> to continue. You will then be prompted for your password so that it can do the install of some file.
Note: If you system is way out of date (like mine was), you may get a certificate error. If so, follow the next certificate error section.
Certificate Error
This section only needs to be done if you encounter a certificate error. The certificate error comes because your system is a little older and doesn’t have the latest certificates that the mirrors are apt mirrors are using. If you encounter this, enter the following:
$ sudo bash
# echo 'Acquire::https::mirrors.switch.ca::Verify-Peer "false";' > /etc/apt/apt.conf.d/99switchca-cert
# exit

$ python3 upgrade.py
Now you should be able to run the OctoPi script again without the error.
Continuing to upgrade to Python 3
The script will now continue and do all the upgrades by itself.
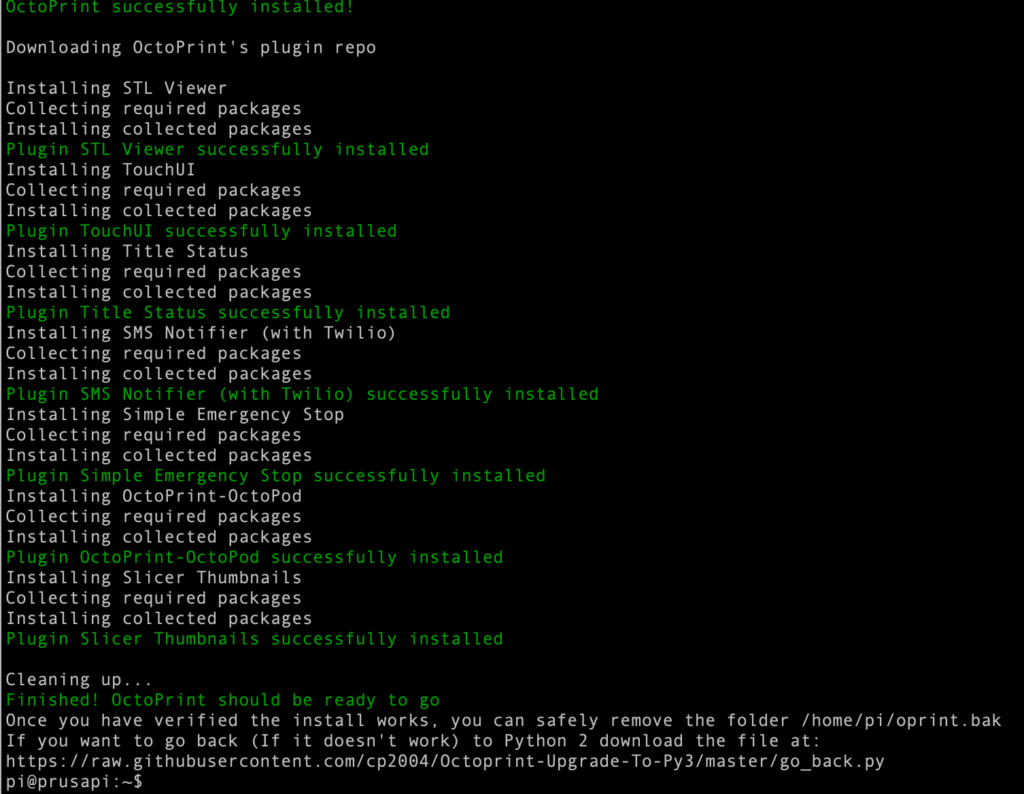
Once the script completes, you should be able to login to OctoPrint on the web interface. Test it to make sure if it looks good and there are no issues. Once you are sure, then you can delete the old version by running the following command:
$ rm -rf /home/pi/oprint.bakRef: https://github.com/cp2004/Octoprint-Upgrade-To-Py3#using-this-script